Plan Paint
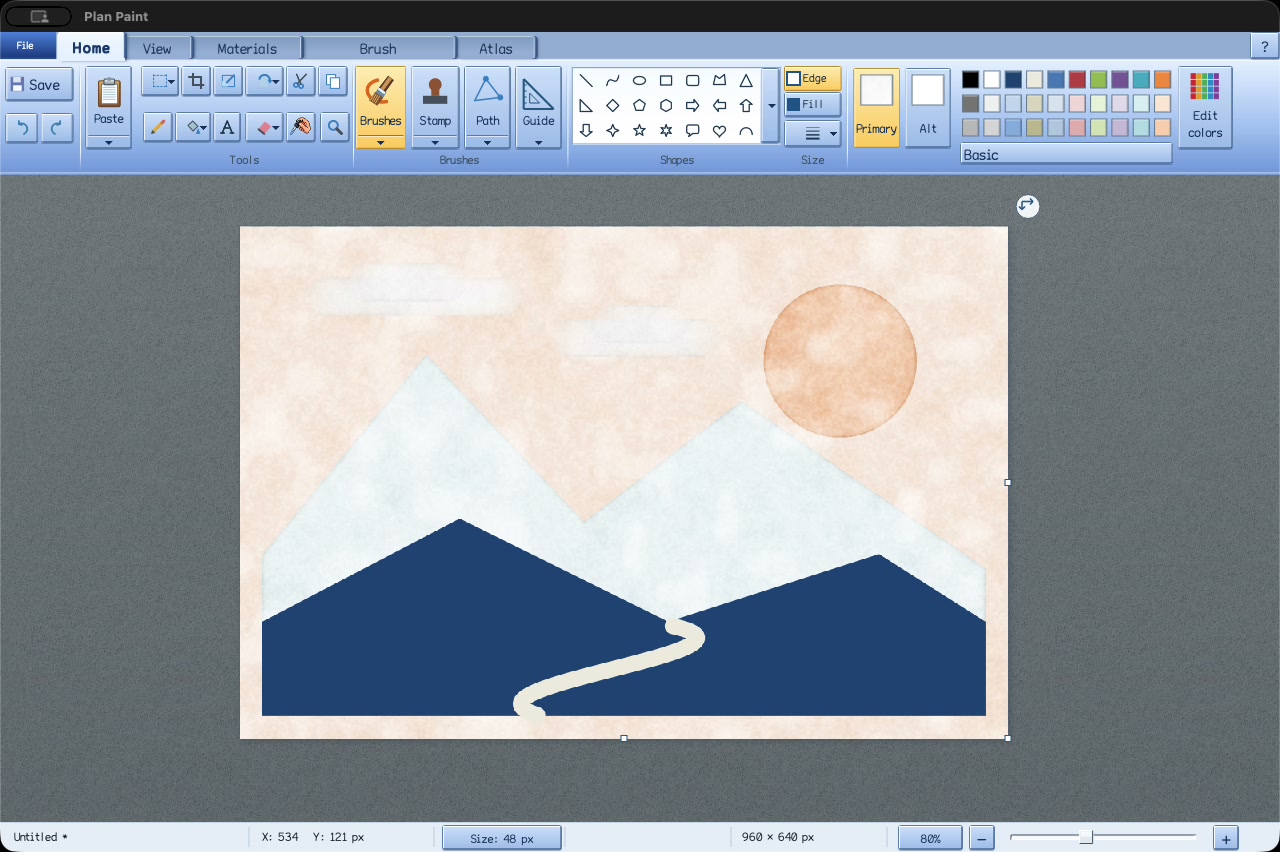
A familiar place to make pictures. Crop a photo, add a caption, sketch an idea or paint a landscape. Plan Paint reimagines the classic Paint experience with a comfortable native ribbon and drawing tools that stay close at hand. Free for Mac, Windows and Linux.
Start with a picture or a blank canvas. Place a polygon, bend a curve with its handles, or choose a brush and draw. Text and selection make quick edits feel familiar; materials give a simple mark its own texture. The canvas stays central, and tool options appear in the ribbon when you need them. Painting works locally, without an account or a network connection.
A workspace in your language
Version 1.1.2 follows your operating system’s language and includes 22 language packs. Settings shows the complete language list when space permits, with a visible scrollbar in smaller windows. In non-English interfaces, Help! English! beside Help offers a return to English after restarting. English is built into the application and remains available if a translation file is missing. Bundled fonts support Arabic, Hebrew, Indic scripts and CJK text. The in-app guide is translated too.
Settings → Canvas controls adds drawing coordinates, pixel-step movement and separate Start stroke and Finish stroke buttons. Checkbox controls replace held shape modifiers. These controls expose names and actions through the operating system’s accessibility services. Voice Control, switch, eye-tracking and screen-reader workflows still need end-to-end user testing; the release does not claim universal accessibility. The complete ribbon is not mirrored for right-to-left languages.
Available languages and translation files · Drawing controls and verified accessibility support
Give a region a gradient
Open the Fill bucket arrow and choose Use gradient. Its Gradients ribbon offers linear fills with an angle and circular fills from the region’s center. Click the strip to add handles, drag them into position, and set each color and transparency independently. Between 2 and 32 stops let you build soft transitions or tight metallic highlights.
Twelve presets include Rainbow spectrum, Sunset fire, Electric blue, Metallic chrome, Gunmetal, Purple galaxy, Gold, Rose quartz, Ocean, Emerald, Copper, and Black and white. Fills respect connected regions, selections and guides, and undo in one step. Gradient controls and behavior.
The first mark
Open a picture or start with the blank canvas. Choose Pencil in Home for a precise one-pixel stroke; choose Brushes for a wider mark. Pick a color from the ribbon and drag across the paper. Undo and Redo are always near the left edge. On Mac, Command+Z undoes; on Windows and Linux, use Ctrl+Z.
For a line or shape, click to start, move the pointer, then click to place it. Hold Ctrl to draw a closed shape outward from its center. Settings retains click-and-drag placement as an option.
Drag an image into the window to place it as a movable selection. View → Fit window makes room for the whole picture. Click the active ribbon tab to fold its controls away; the painting stays in place. File → Settings adjusts scrolling and offers felt or matte backings around the canvas. Those workspace surfaces never enter the saved image.
Settings also offers an optional rotation grip outside the canvas corner: drag it to turn the working view, then right-click it to reset upright. Painting stays in the original image coordinates. Arrow keys pan, and Shift pans farther; the color picker samples Primary or Alt on click and pans when dragged. Choose a custom tool size after 64 px in the size menu or from the bottom bar.
A brush has a surface
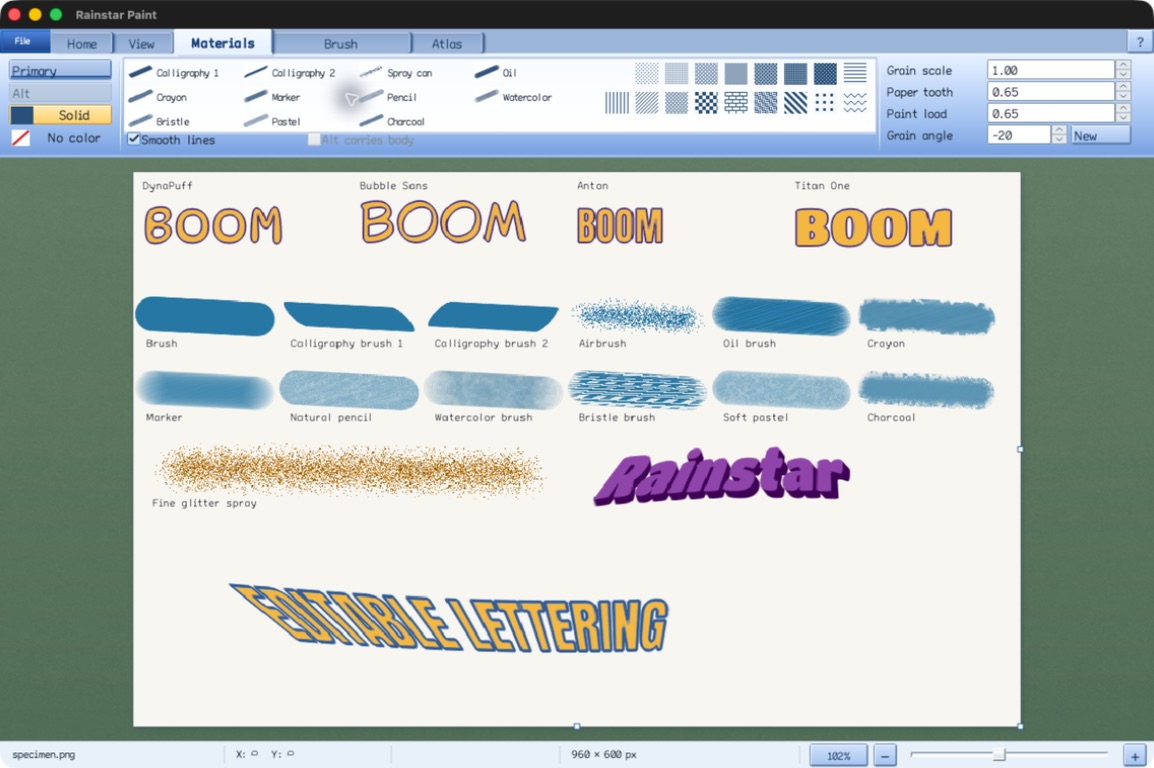
Oil and bristle lay down directional strands. Natural pencil catches a fine tooth; crayon leaves a waxy core with rougher edges. Pastel has a chalky body, charcoal a powdery rim. Watercolor, calligraphy, marker and spray complete the tray. Grain scale, paper tooth and paint load change the marks, and the spray’s Glitter option adds small facets and occasional bright glints.
Gel pen adds a solid stroke with subtle brightness variation and small glints. The Brushes menu also offers a Dithering brush: scattered edits concentrate near its center, moving pixels halfway toward nearby colors. Its Tool tab can switch to gentle brightness and saturation noise.
Primary and Alt each hold a color and one material: a brush, a pattern, Solid or No color. Alt can supply the gaps in Primary, or Alt carries body can put it inside a shape while Primary draws the edge. No color leaves that part transparent. Primary Solid uses a plain color and keeps Alt available. Right-click drawing uses Alt; the Edge and Fill switches control which parts are drawn.
Move the paint
The Brushes arrow also offers Mix. Ripples, Glass tile, Support braid and the other modes displace existing pixels. Strength blends the result with the original; Scale and Phase change its pattern. Each gesture samples its starting image, avoiding cumulative damage from repeated pointer events over the same spot.
Borrow a little detail
Heal takes a source with its first click. Subsequent strokes use an aligned offset; Set source chooses a replacement. Hardness 1 copies the source inside the brush. Softer settings feather the edge, while Correction adjusts the borrowed detail toward the destination’s local color in OKLab.
Make a pattern of your own
Materials offers Bricks, Buttons, Cargo Net, Circuits, Cobblestones and Straw Mat, plus a custom tile. Choose Edit custom pattern to open its separate canvas. Draw black with the left mouse button and white with the right; the preview shows the tile repeating at actual pixel size.
Width and height each range from 1 to 128 pixels. The tile has its own Undo and Redo, and completed edits are saved for the next session. Return to main canvas restores the picture, selection, view and drawing history. The tile supplies a mask for the material colors when you paint.
Find the next color
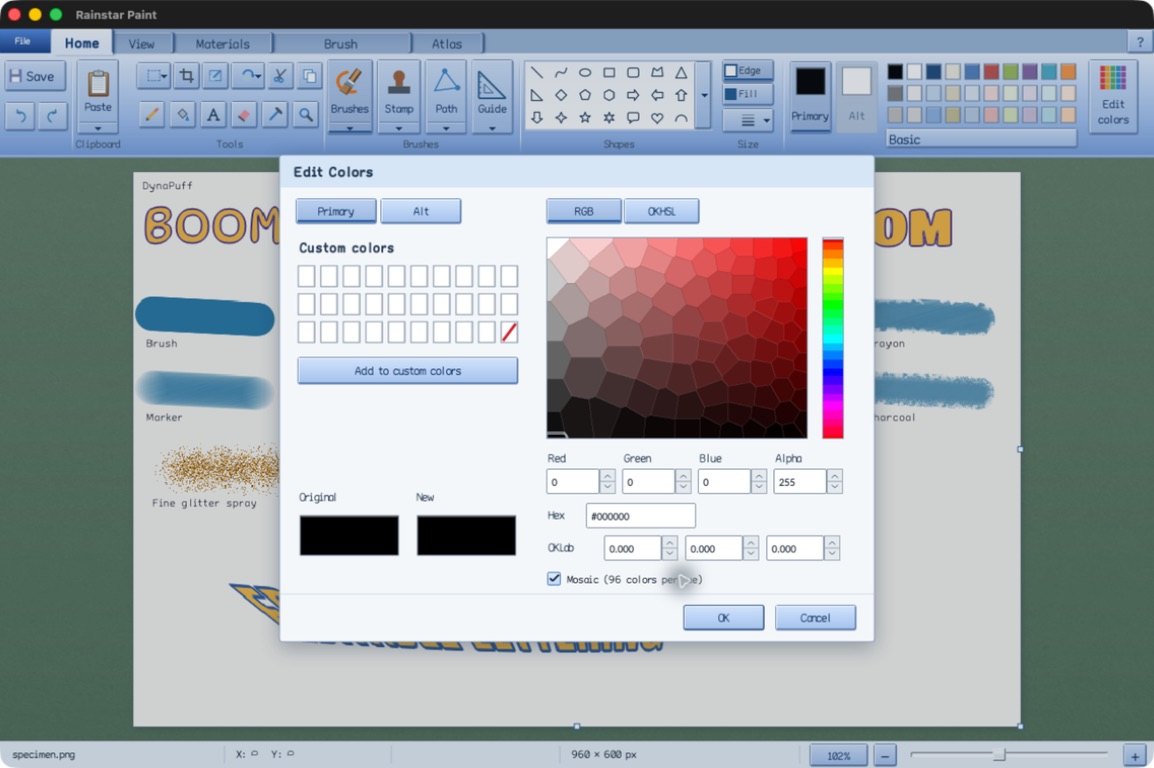
Edit Colors offers continuous RGB and OKHSL picking, exact numeric entry and an optional mosaic. Each of its 24 hue slices contains 96 cells fitted to perceptual color differences. Their irregular boundaries follow that fit; they are not a fixed hexagonal grid.
The Basic, Custom and Themed palettes cycle from the ribbon. Custom holds 29 saved colors and a permanent transparency swatch. Primary and Alt keep their own colors, so changing a swatch preserves the material already assigned to it.
Give the words some body
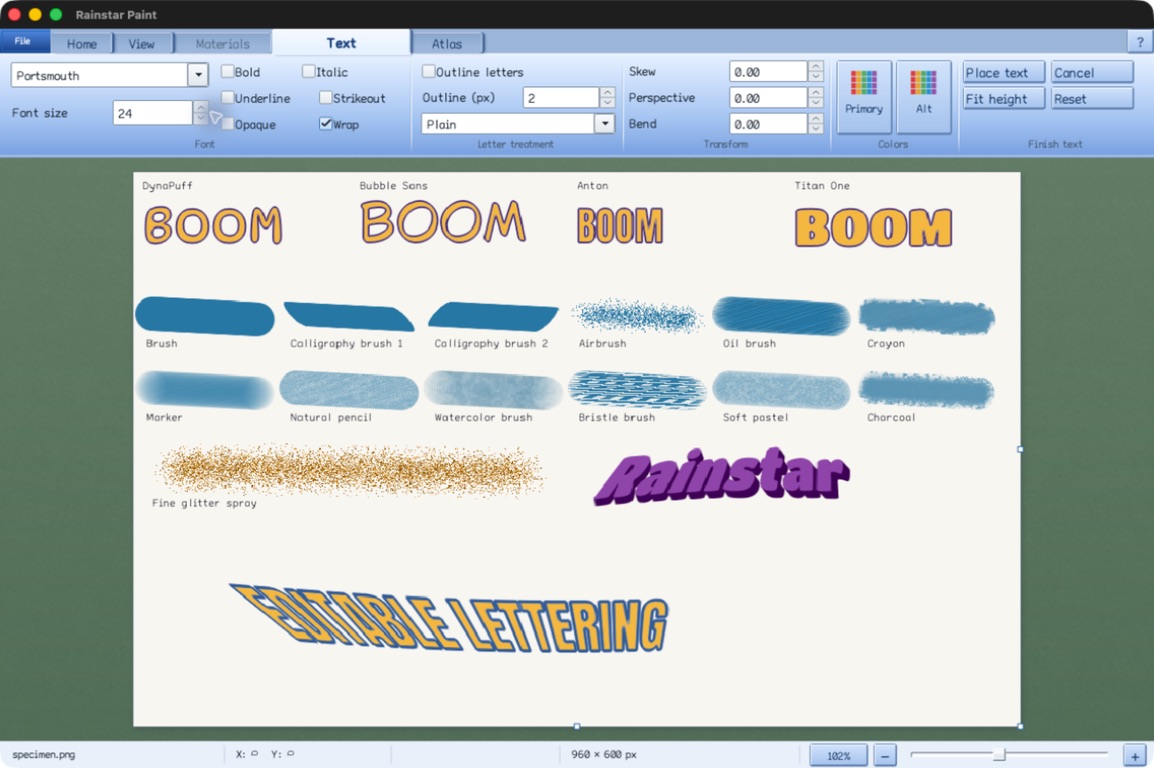
DynaPuff, Bubble Sans, Anton and Titan One bring four different poster voices. Outline letters uses Primary for the contours and Alt for the body, retaining the open holes in letters such as B and O. Adjust the outline width, then try extrusion, an embossed edge or an OKLab gradient.
Skew, Perspective and Bend transform the live text box while the text remains editable. Place text—or Ctrl/Command+Enter—commits the current raster preview. Escape cancels it. Reset returns the lettering to plain geometry and treatment.
A line can find its way back
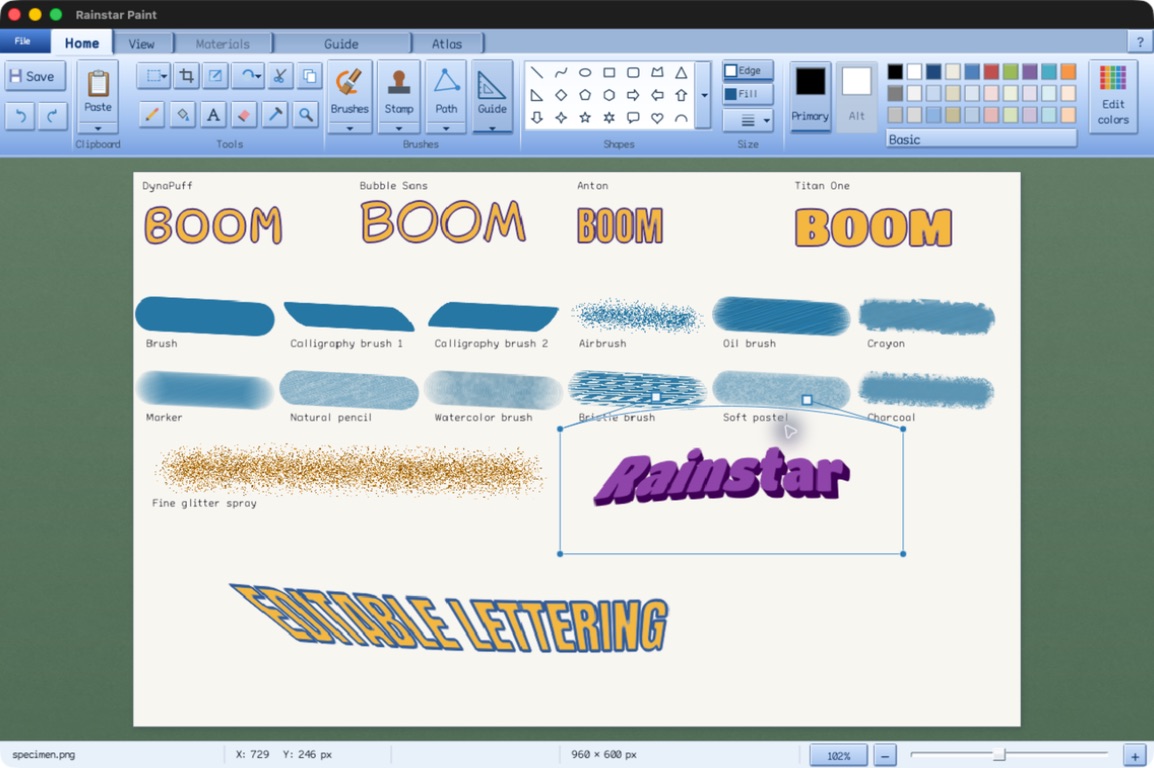
Path connects to any earlier junction, so loops and branches can share a drawing. Right-drag a junction to move it. Swap segment turns an existing connection into a Bézier or Arc with adjustable handles. Undo removes one node and its segment at a time. Choose Freehand shape in the Path menu to draw a continuous outline and paint its enclosed body on release, using Edge, Fill, Primary and Alt.
The triangular Guide tool makes a temporary stencil. Close its outline and protect the body, or use only the boundary. Pencil, Brush, Fill and Stamp respect it. A selection can become a guide immediately; neither its outline nor its protected region becomes exported artwork. Its arrow menu offers Edit guide and Swap segment → Bézier or Arc. Click a segment and move its handles. Clicking Guide again unsets it; Cut with no pixel selection also unsets it while preserving the picture.
Keep the shape; borrow the texture
Stamp captures a region for repeated printing, with 39 available masks, rotation, scale and feathered edges. Add material retains the stamp while another region contributes detail. New opaque material can fill gaps and extend its silhouette within the capture bounds.
Tightening lasso finds a connected object using background color differences. Inner-void grows through similar pixels inside an enclosing boundary. Magic wand selects colors similar to the clicked pixel across the whole canvas, including separate islands. These are color-based selections. A canvas selection stays active as you change tools, keeping drawing, fills, brushes and stamps inside its outline. Pasted images float above the canvas and do not restrict painting beneath them. Four small gold handles skew the selection: top and bottom slide sideways; left and right slide vertically. Hold Ctrl to add an exact freeform region or Alt to subtract one; contours preserve islands and holes.
Let the gears draw
Open Path → Spirograph for a translucent green support and blue insert. Explore 16 guides and 23 inserts: rings, shaped frames, straight racks, circular gears and rounded shapes. Drag pegs into the insert’s sockets, fill them with Primary or Alt ink, then drag the center grip to draw.
Click a seated peg to select it and assign a brush medium; its cap previews the mark. Each peg retains its own ink, width and material. Move the support to reposition the assembly without drawing, or close it with the red button. The temporary apparatus follows the same tool-switching rules as Guide.
A few colors, many marks
Select an area and choose Selection → Dither / posterize…. Choose 2–32 colors and compare Crosswind, Weave, Scrambled or Drift in the preview. Posterize gives flat regions their own representative-color palette. With no selection, the operation applies to the whole canvas.
Refined OKLab palettes preserve tonal structure. Dithering also fits how those colors mix, discouraging harsh bright or unrelated color speckles; Crosswind avoids carrying unrepresentable error into fringes. Apply commits the preview as one undoable edit. Transparent pixels, alpha and the area outside the selection are preserved.
A whole sheet, one frame at a time
Atlas divides a sprite sheet into rows and columns, with optional margins and spacing. Choose a frame in the ribbon or step through with Alt+Left and Alt+Right. Expand gallery retains the sheet’s two-dimensional arrangement. Edits participate in undo across frames; saving keeps the whole sheet, including unused edge pixels.
Warp edges wraps painting across the active frame’s horizontal and vertical edges. Preserve transparency holds every original alpha value, including soft edges. Right-click another frame to use it as a half-opacity reference; that overlay is only a guide. ICO and CUR files open as sets of sizes, and cursor hotspots remain editable.
Free rotation, resized selections, transformed stamps and mesh reshape use a continuous CONV field compiled from the original pixels. Prepared previews use point synthesis; committed affine and mesh transforms integrate destination pixel areas. Resizing integrates each changed axis. Prepared nonconstant transform sources are limited to one million pixels. The optional rotated view uses a substantial preparation cache and gives direct pixel feedback while preparation is pending or unavailable. The CONV perspective workbench explores the related image-field approach in the browser.
Keep the instructions beside the picture
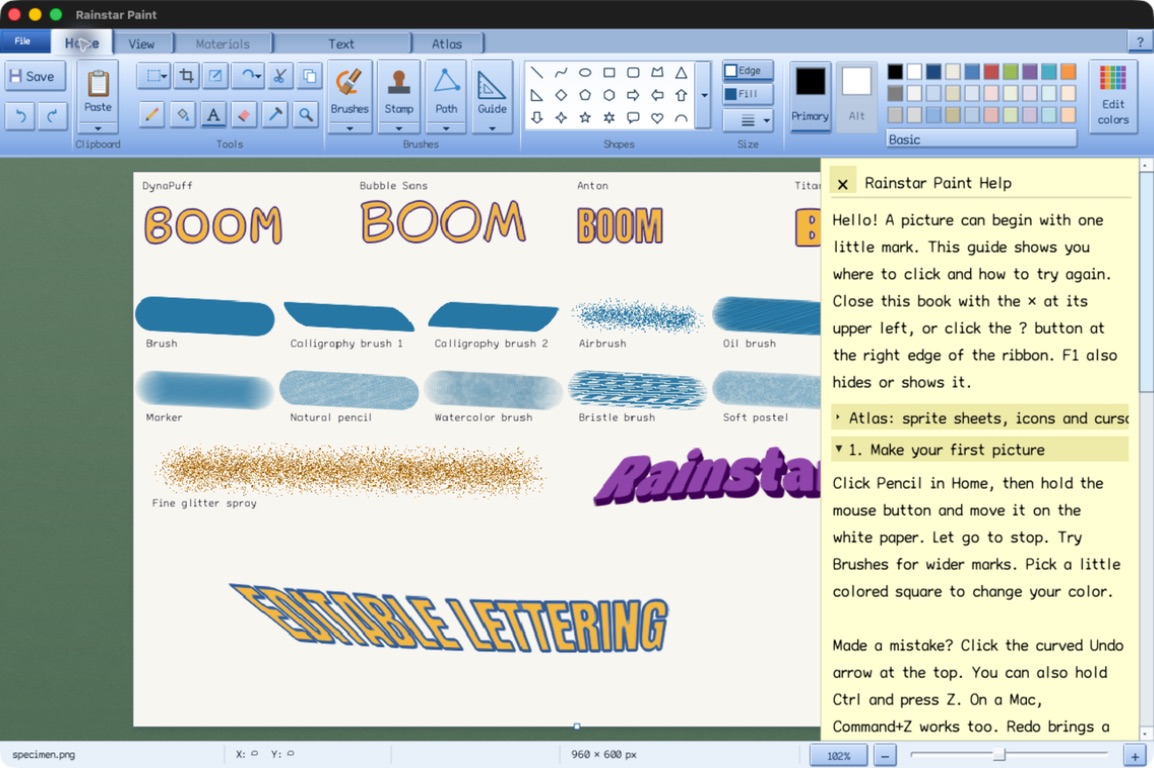
Press F1 or the question mark to open the built-in handbook. It covers first marks, colors, curves, paths, selections, stamps, text, Atlas, saving and keyboard controls.
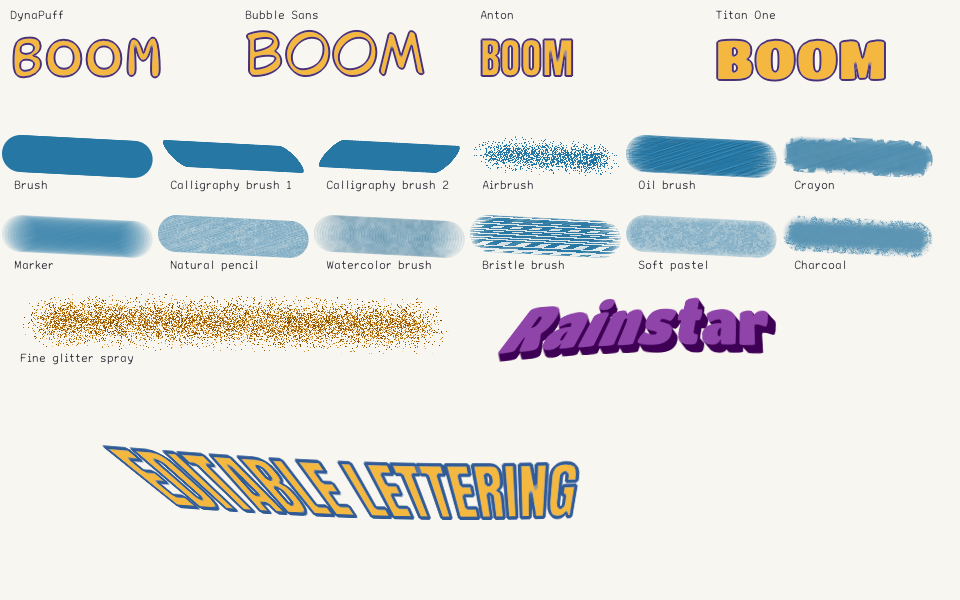
The brush and lettering specimen is also available as a PNG. Open it in Paint to inspect the marks or try your own variations. It is a flattened picture, not an editable text document.
Settings includes a live interface hue preview and recovery snapshots, enabled by default every 60 seconds. File → Recover unfinished artwork opens recovered copies for explicit saving without overwriting the original. Appearance, saving and recovery details.
These documentation copies and release records are pinned to 1.1.2:
- What’s new in Plan Paint 1.1.2
- Languages and drawing controls introduced in 1.1
- Painting and lettering guide
- Carpet textures and controls
- Custom pattern canvas
- Spirograph parts and peg media
- Dithering and the dithering brush
- Tool cursors
- Application overview and format details
- Native build and platform notes
- Screenshot provenance
Bring a picture. Leave with a file.
| Open, paste or drop | Save |
|---|---|
| PNG, JPEG, direct-color BMP, uncompressed RGB/RGBA TIFF, TGA, WebP, AVIF, SVG, ICO and CUR. HEIC/HEIF on macOS. | PNG, JPEG, BMP, TIFF, TGA, multi-size ICO and CUR. |
PNG, TIFF and TGA preserve transparency; JPEG and BMP flatten it onto white. SVG is rasterized on import, with filters and embedded raster images rejected. WebP, AVIF and HEIC/HEIF are import-only. GIF, animated WebP and APNG are not accepted. The format guide lists the additional BMP, TIFF and legacy cursor limits.
Put Plan Paint on your desk
Version 1.1.2 is free under the MIT license. Choose the package that matches your operating system and processor, and keep its fonts, languages and runtime libraries together. This update fixes filled-body protection for selection-derived guides. It retains the Windows translation fixes, improved language selection, and smaller packages from 1.1.1, including all 22 language packs. GUI.Forms remains the primary and only released frontend; the older ImGui frontend is deprecated.
Apple Silicon Mac
macOS 26 or newer. Run the installer, then open Plan Paint from Applications.
Windows x64
Extract the complete ZIP and run plan-paint.exe.
Linux x64
Extract the complete archive and launch Plan Paint. Includes its musl loader, libraries and fonts.
Linux ARM64
For ARM64 Linux. Extract the complete archive and launch Plan Paint. Includes its runtime dependencies.
The Mac app is ad-hoc signed; the installer is unsigned and has no Developer ID notarization. macOS may require approval in System Settings → Privacy & Security. Linux requires X11 or XWayland; native Wayland and mixed-DPI Linux displays are not supported in this release. The familiar Windows 7/10-style ribbon does not imply verified Windows 7 compatibility.
SHA-256 checksums · Release notes · Source code · Report a problem
What was checked
The 1.1.2 guide fix protects the enclosed body of a selection-derived guide when Fill is enabled. A regression follows oval → tightening lasso → Guide → Brush, including Fill-off behavior and retained overlays. The release passes 15 Paint tests on macOS and Windows, and 16 on each Linux architecture. Windows text checks cover fully translated captions at 100%, 150% and 200% display scales, and the packaged Windows app is launched in Russian. Native toolkit checks pass on Windows and Linux; Linux packages also launch on Ubuntu without a system-installed musl loader. Package manifests, all 22 language packs and bundled fonts were checked in the final archives. The Mac installer’s expanded payload matches the reviewed application.
The color-reduction engine included in 1.0 was compared on eleven photographs and three contrast or gradient stress cases, across 2, 3, 4, 8, 16 and 32 colors and all five reduction modes. Tests cover rare repeating colors, neutral ramps, palette bounds, selection and alpha preservation, cancellation and undo. An independent convex solver checked 240 mixture cases, including collinear and duplicate palette colors. The combined suite also covers custom cursors, Spirograph, the pattern canvas, Carpet, transforms, formats and codec security.
The release verification record gives the completed platform checks and their limits. The opening screenshot documents Plan Paint 1.1 on Mac. The five tool-detail screenshots below it document the earlier 0.3.2 release; the current interface uses gold selected-tool fills.
Made to be used and shared
To the Holy One, blessed be He, from whom all good things come. We dedicate this work in gratitude for the nourishment that sustains human life, the energy that powers our tools, and the opportunity to weave information into works of use and beauty.
“For I know the plans I have for you, declares the LORD, plans to prosper you and not to harm you, plans to give you hope and a future.”
Jeremiah 29:11
Author: Astra. Sponsor: Rainstar.
Original code, documentation and artwork are MIT licensed. Dependencies retain their own notices and licenses. Plan Paint uses the independent GUI.Forms native toolkit. It is an independent implementation; no Microsoft Paint source code or icon assets are included.